

Do you love applying makeup every single day to look fresh and glowing? If so, you probably have a lovely collection of makeup brushes sitting on your dressing table right now. We often spend so much time picking out the right foundation or eyeshadow, but we rarely think about the tiny tools we use to put it all on. Did you know that failing to wash your makeup brushes properly can cause serious damage to your skin? From stubborn breakouts to painful skin infections, dirty brushes harbor hidden dangers that you need to know about right away.
Let us take a close look at why your makeup brushes need regular cleaning and how you can easily protect your skin starting today. By taking just a few minutes each week to wash your beauty tools, you can maintain a clear, radiant, and healthy complexion.
- Dirty makeup brushes collect oils, dead skin cells, and bacteria that clog your pores and cause acne.
- Liquid product brushes need weekly washing. This powder brushes can be cleaned monthly.
- Always use gentle baby shampoo and lukewarm water to protect the delicate bristles and glue.
- Dry your brushes horizontally with the tips hanging slightly over the edge to prevent water damage.
- Never share your makeup brushes with friends to avoid spreading skin infections.
BMI Calculator
Know your body mass index (BMI) and weight classification
Why Do You Need to Clean Makeup Brushes Often?
Simply put, your makeup brushes can easily turn into a paradise for bacteria. Think about what happens when you apply makeup every morning. The natural oils from your skin, dead skin cells, leftover dust, and environmental pollution all stick to the soft bristles of your brush. After you finish your makeup, you store the brush away, and the cycle repeats the next day. This moist, warm environment loaded with old makeup and oils is the ideal breeding ground for harmful germs.
What happens when you press that dirty brush back onto your sensitive face day after day?
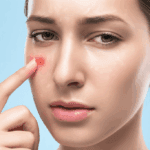
- Acne Breakouts: The trapped bacteria and facial oils push deep into your skin pores, triggering painful acne, blackheads, and whiteheads.
- Skin Irritation and Redness: Old product buildup makes the bristles rough and scratchy, causing your skin to turn red, itch, or develop small bumps.
- Skin Infections: If you have even a tiny scratch or minor open blemish on your face, the trapped bacteria can enter directly and cause severe infections.
Because of these risks, keeping your makeup brushes clean is an absolute must if you want healthy, glowing skin.
How Often Should You Clean Your Makeup Brushes?
The exact washing schedule depends on the type of brush and the kind of makeup products you use. Not all brushes get dirty at the same speed. As a general rule of thumb, washing your brushes every seven to ten days is a wonderful habit to build.
To make this super easy to understand, let us look at the breakdown below:
| Brush Type and Usage | Recommended Cleaning Time | Why It Matters |
|---|---|---|
| Liquid Products Examples: Foundation, Concealer, Cream Blush |
At least once a week | Liquid formulas soak deep into the bristles, making them a major breeding ground for bacteria. |
| Eye Makeup Brushes Examples: Eyeshadow, Eyeliner brushes |
At least every two weeks | Your eyes are extremely sensitive areas, and dirty brushes raise the risk of eye infections. |
| Powder Products Examples: Face powder, Blush, Bronzer |
Once a month is enough | Powders have less moisture so bacteria grows slower, but dust and skin oils still accumulate. |
If you use makeup sponges or beauty blenders, you must clean them just as often. Sponges absorb massive amounts of water and cosmetic cream, allowing bacteria and yeast to multiply very quickly.
Here Is How to Clean a Makeup Brush Properly
Now that you know why it matters, let us walk through the exact steps to do this right. If you follow these simple steps, your brushes will feel and look brand new.
- Rinse the Tips: First, hold only the bristled tip of the brush under a gentle stream of lukewarm water. Never submerge the entire brush handle in water. The hot water can dissolve the glue holding the bristles to the handle, causing them to fall apart.
- Apply Gentle Shampoo: Mix a mild cleanser, such as a gentle baby shampoo, into a small cup of lukewarm water. Avoid harsh dish soaps or strong detergents because they strip the natural fibers and make the bristles coarse and stiff.
- Swirl and Massage Gently: Dip the tip of your brush into the soapy water mixture and swirl it around. Next, gently massage the bristles in a circular motion right on the palm of your hand. This creates a rich lather that lifts away trapped makeup from deep inside.
- Rinse Again: Now, place the bristled tip of your brush under running tap water once more to wash away all the soap and loosened residue.
- Repeat Until Water Runs Clear: Repeat steps two, three, and four until the water running off your brush is completely clear. If the water has no leftover makeup tint, your brush is thoroughly clean.
- Squeeze Out Excess Water: After washing, gently press the bristles using a clean towel or paper towel to squeeze out any extra water.
- Dry Correctly: This is the step many people get wrong. Lay your brushes flat on a clean, dry towel. The most important rule is to let the bristled tips hang slightly over the edge of your table or counter. This allows air to circulate freely all around the bristles so they dry evenly.
Are Your Brushes Scratchy After Drying?
Sometimes, after washing and drying, your brush bristles might feel a little stiff or rough. If that happens, simply put a tiny drop of regular hair conditioner onto the bristles, let it sit for a minute, rinse it thoroughly with clean water, and let it dry again. This easy trick will make your brush bristles super soft once more.
Household Items You Can Use to Clean Brushes
You do not need to buy expensive specialty brush cleaners from cosmetic shops. You can easily use everyday items found right around your house to get the job done.
| Cleaning Agent | How to Use It |
|---|---|
| Baby Shampoo | This is the safest and best option. It is extremely gentle on brush fibers while effectively removing dirt and oils. Use it just like standard shampoo. |
| Liquid Dish Soap | Great for breaking down stubborn, heavy, or caked-on foundation. However, use only a tiny drop mixed with plenty of water, and rinse very well afterwards. |
| Vinegar and Lemon | A wonderful natural disinfectant. Mix two tablespoons of white vinegar into a cup of warm water to wash the tips. Rinse with water, then rub a fresh lemon wedge over the bristles to leave a pleasant scent. |
When Should You See a Doctor?
If you keep your brushes clean and follow a great skincare routine, but you still suffer from persistent acne, red rashes, or stubborn skin infections, the root cause might be something else entirely. In such situations, do not keep guessing on your own. Seek medical advice right away. Visiting a qualified medical doctor, specifically a professional dermatologist, is your best choice to diagnose underlying skin conditions.
Also, if your brushes are very old, losing bristles rapidly, or misshapen, stop using them right away. Old brushes cannot apply makeup smoothly and can trap bacteria in frayed fibers, harming your skin. Throw them out and replace them with new ones.
💡 Take-Home Message
Protecting your skin health is simple when you build the right daily habits. Here are the core points to remember from our guide:
- Make it a regular habit to wash your makeup brushes at least once a week or every ten days to safeguard your skin.
- Pay extra attention to foundation and concealer brushes since liquid products attract bacteria much faster.
- Always use a mild cleanser like baby shampoo when washing your cosmetic brushes.
- Dry your washed brushes horizontally with the bristle tips hanging over the edge, never standing upright.
- Never share your personal makeup brushes or sponges with anyone else to prevent cross-contamination.
- If you notice ongoing skin breakouts, rashes, or stubborn infections, consult a doctor or dermatologist right away.
Sources & References:
1. Cleveland Clinic. How to Clean Your Makeup Brushes (And Why You Need To). Retrieved from health.clevelandclinic.org
2. American Academy of Dermatology Association (AAD). Skin Care Tips: How to Prevent Acne and Skin Infections. Retrieved from aad.org
3. Mayo Clinic. Skin Infections: Common Causes and Prevention Strategies. Retrieved from mayoclinic.org
4. National Health Service (NHS UK). Looking After Your Skin and Cosmetic Hygiene. Retrieved from nhs.uk





No comments yet. Be the first to share your question or experience below.