
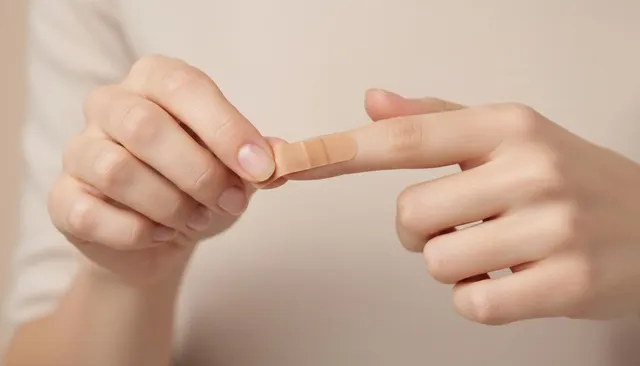
Picture this: you are chopping fresh vegetables in your kitchen, or your energetic child scrapes their arm while playing outside. Scrapes and minor cuts happen to all of us during normal daily life. Sometimes a standard adhesive bandage fixes the problem right away, and you can move on with your day.
Other times, the cut looks a bit deep and the edges of the skin pull apart, but the injury is not severe enough to require traditional stitches. That is when medical tape strips known as Steri-Strips or butterfly bandages become very useful tools for home first aid. Pretty surprising how much these simple adhesive strips can do, right?
Let us explore how these adhesive strips work, which types of wounds are safe to treat at home, how to apply them properly, and when you must see a doctor right away.
📌 Key Takeaways
- Steri-Strips and butterfly bandages act like temporary stitches to hold minor skin edges together.
- They work best on shallow, clean cuts where the skin edges easily close back up.
- Always wash your hands and clean the wound thoroughly before putting any adhesive strips on your skin.
- Never use tape strips on deep wounds, animal bites, dirty punctures, or cuts that will not stop bleeding.
- Watch closely for redness, swelling, pus, or bad odors, which mean the wound is infected and needs a doctor.
Know your body mass index (BMI) and weight classification
What Are Steri-Strips?
Steri-Strips are thin, sterile adhesive strips designed to bring the edges of a minor cut or wound together. When a cut opens up slightly, these medical tapes hold the skin sides close so the tissue can heal faster and cleaner. Think of them as a temporary set of stitches that you can apply without a needle. Doctors and surgeons also use Steri-Strips in hospitals and clinics to close surgical incisions after operations.
The main job of these tape strips is to bridge the gap across the wound. By keeping the skin edges touching, they speed up natural healing and greatly lower the chance of germs entering and causing an infection. Just think about it for a second—keeping bacteria out is half the battle when dealing with any skin injury, isn't it?
You can usually find Steri-Strips or butterfly bandages inside your home first-aid kit. However, the most important rule to remember is that these strips are only meant for minor, suitable cuts and do not replace stitches for severe injuries.
When to Use Steri-Strips and When to Avoid Them
Knowing when you can treat a cut at home and when you need professional medical help is vital for your safety. What do you think makes a cut too dangerous for home care? Usually, depth, location over a joint, or heavy bleeding are the big red flags.
Let us review this comparison table before deciding how to treat any skin injury:
| Wound Feature | Safe for Steri-Strips / Butterfly Bandages / Needs Stitches or Urgent Care |
|---|---|
| Depth & Layers | Safe for Steri-Strips / Butterfly Bandages: Superficial, shallow cuts in the top layers of skin. Needs Stitches or Urgent Care: Deep cuts exposing fat, muscle, or bone. |
| Edges | Safe for Steri-Strips / Butterfly Bandages: Clean edges that easily push back together. Needs Stitches or Urgent Care: Jagged, gaping, or torn skin edges that won't stay closed. |
| Bleeding | Safe for Steri-Strips / Butterfly Bandages: Minimal bleeding that stops quickly with direct pressure. Needs Stitches or Urgent Care: Heavy, spurting, or continuous bleeding after 10 minutes of direct pressure. |
| Location | Safe for Steri-Strips / Butterfly Bandages: Flat areas of the body with low movement (forearm, shin, forehead). Needs Stitches or Urgent Care: High-tension areas over joints (knees, elbows, knuckles) or the face where scarring is a major concern. |
| Cause | Safe for Steri-Strips / Butterfly Bandages: Clean kitchen knife, paper cut, clean glass edge. Needs Stitches or Urgent Care: Animal bites, human bites, dirty punctures, rusty nails, or crush injuries. |
If you have any doubt about whether a cut is safe to treat at home, do not guess. Visit your nearest hospital Emergency Department (ER / A&E) or urgent care clinic, or call emergency services right away.
Steri-Strips, Butterfly Bandages, and Butterfly Stitches: Are They the Same?
People often use these terms interchangeably, but there are distinct differences between these medical supplies and procedures. Have you ever wondered why some are called butterfly bandages while others are strips? Let us break this down:
- Steri-Strips: These are straight, uniform adhesive strips. Doctors and nurses in clinics and hospitals use this specific product format very often.
- Butterfly Bandages: These adhesive bandages look like butterflies because they are wider at the ends and narrow in the middle. The narrow center part goes right across the cut. You can easily buy these at local pharmacies for home first-aid kits. They perform the exact same function as Steri-Strips.
- Butterfly Stitches: This is completely different from the first two items. This is not an adhesive bandage; it is a real surgical stitch. A doctor uses a medical needle and thread to place deep sutures in a butterfly pattern beneath the skin layers. This intracutaneous method provides internal structural support.
In short, Steri-Strips and butterfly bandages are sticky tape strips you can apply yourself at home. Butterfly stitches are genuine medical sutures placed by a trained doctor.
How to Apply a Steri-Strip Correctly
Applying adhesive strips correctly helps your wound heal quickly and lowers the risk of scarring. Follow the instructions that come with your medical product package along with these general steps:
- Wash your hands thoroughly first: Scrub your hands with clean soap and running water. Having clean hands is mandatory before touching any open wound.
- Clean the wound and surrounding skin: Use lukewarm water and a mild soap, such as baby soap, to gently wash around the injury. Next, use a clean cloth or sterile gauze pad to pat the area dry.
- Apply the first strip: Find the exact center of the cut. Place your first Steri-Strip across the middle of the wound rather than at either end. Press one half of the strip firmly onto the skin on one side of the cut while holding the other half up.
- Bring the wound edges together: Use your fingers to gently push the two sides of skin together. Make sure there is no gap left open. The edges must touch completely. If they do not touch, the wound can reopen and germs can enter easily.
- Secure the other side of the strip: While holding the skin edges closed, lay down the remaining half of the strip onto the opposite side of the cut. Do not stretch the strip as you press it down, and do not press directly on top of the open cut itself.
- Place additional strips: Apply more strips above and below your first center strip. Leave a small gap of about 3 millimeters (roughly one-eighth of an inch) between each strip. Continue this process until the entire length of the cut is covered.
- Add reinforcing support strips (optional): You can place extra strips parallel to the cut directly across the ends of your horizontal strips. This prevents the primary tape strips from peeling up, creating a grid pattern that holds everything securely.
If you notice blood soaking through the Steri-Strips soon after application, it means bleeding has not stopped. If that happens, stop home treatment and seek medical advice right away. Makes sense, right?
How Long Should You Leave Steri-Strips On and How to Remove Them
Steri-Strips can usually stay in place for up to two weeks. By that time, they often fall off on their own as the skin heals underneath. If the edges of the strips start peeling up before two weeks pass, you can use clean scissors to carefully trim away the loose edges. Do not try to pull off the entire strip if it is still firmly stuck. After two weeks have passed, you can safely remove the remaining tape strips yourself.
The Right Way to Remove Steri-Strips
Never rip adhesive strips off quickly like a regular bandage. Doing that can tear open your newly healed skin. Be honest, you've tried ripping off a regular plaster in one quick yank before, haven't you? Let's make sure you don't do that with healing surgical tape!
- First, remove any reinforcing support strips you placed along the sides.
- Next, remove the main tape strips running across the cut one by one.
- Gently lift one end of the strip from the skin, and peel it back toward the wound. Always peel toward the cut rather than pulling away from it.
- As you peel, place the finger of your other hand gently on the newly exposed skin to support it so the skin does not pull upward.
- Peel until you reach the edge of the wound, and stop there. Do not pull the strip directly across the healing line.
- Repeat the same peeling motion from the opposite end of the strip toward the wound.
- Finally, lift the small remaining piece over the wound with great care.
Removing adhesive strips slowly in two sections prevents you from accidentally opening up your healing skin.
Can You Shower With Steri-Strips On?
Yes, you can usually shower while wearing Steri-Strips. However, if a doctor applied them after surgery, they might advise you to keep the area completely dry for 24 to 48 hours. Always follow your specific doctor's instructions.
Generally, you can wash the area gently with mild soap and water, then pat it dry with a clean towel. Never scrub Steri-Strips with a sponge or pull at them to test their hold. Keep in mind that a delicate skin injury is healing right underneath. Just like we said a moment ago, gentle care goes a long way.
✔️ Do's and ❌ Don'ts
- Do wash your hands thoroughly with soap and water before touching any cut or applying adhesive strips.
- Do clean and dry the skin completely so the tape adheres securely.
- Do peel tape strips slowly toward the wound when it is time to remove them.
- Don't apply Steri-Strips over deep wounds, heavy bleeding, animal bites, or puncture injuries.
- Don't stretch the tape strips tightly across the skin, as this can cause blisters or skin irritation.
- Don't scrub the taped area vigorously in the shower or soak the wound in a bath.
🚨 When to Seek Emergency Care (Red Flags)
If you notice any of these warning signs, don't wait — call your local emergency number right away (911 in the US/Canada, 999 in the UK, 112 in Europe, or 000 in Australia) or go to the nearest hospital Emergency Department (ER / A&E):
- Bleeding that does not slow down or stop after 10 continuous minutes of firm, direct pressure.
- The wound is deep enough to reveal underlying fat, muscle, tendons, or bone.
- Signs of infection such as spreading redness, red streaks, severe throbbing pain, swelling, warmth, or pus draining from the cut.
- Numbness, tingling, or inability to move the fingers or toes near the injury site.
- The injury was caused by a dirty, rusted object, a human bite, or an animal bite.
💡 Take-Home Message
- Steri-Strips and butterfly bandages are fantastic first-aid tools for shallow, clean cuts that close easily.
- Proper application—clean skin, aligned edges, and no tension—ensures a strong hold and minimal scarring.
- Always monitor the healing process and watch closely for any signs of infection.
- When in doubt about the severity of a cut, always seek evaluation from your Primary Care Physician (PCP), family doctor, urgent care clinic, or local hospital Emergency Department (ER / A&E).



No comments yet. Be the first to share your question or experience below.